Building a 1/64th Scale Farm Diorama
The Winter Blahs are upon me, and I need something to occupy my time. I have a fair collection of 1:64 Ertl diecast farm toys that have been sitting around collecting dust. I also have an HO scale (which is 1:87) barn.
Years ago, I was into model railroading and always enjoyed building the scenery and structures. Moreso, in fact, than actually running trains.
So, a diorama seemed like a natural.
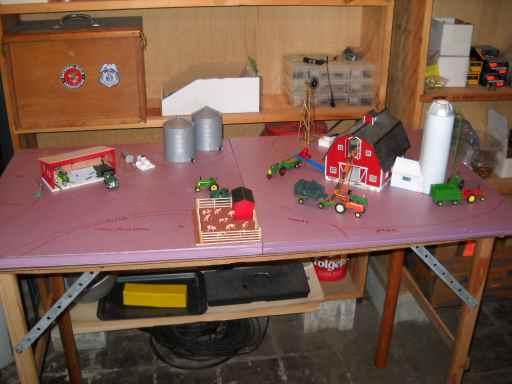
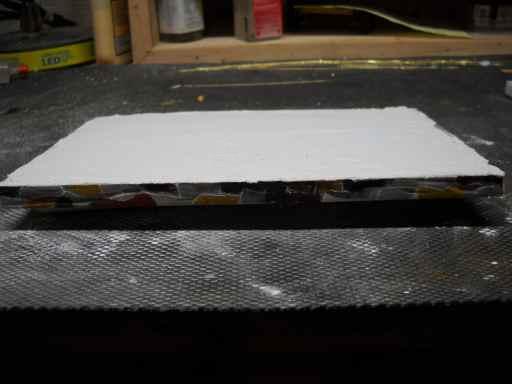
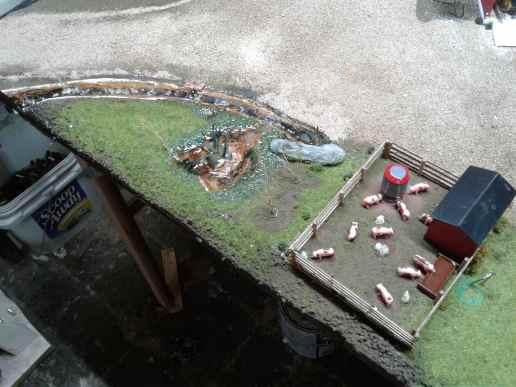
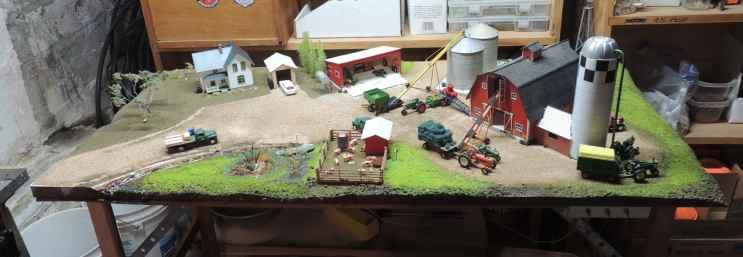
Using the barn as the central feature, I played with various arrangements to determine the overall size of the diorama. I had initially thought 2x2 would be about right, but it was soon apparent that I wouldn't be able to include all the things I envisioned, so I ended up with a 2 by 3 foot base. The base is 1” foam insulation gluded down over a piece of masonite for stiffness. The legs were cut to a convenient working height.
Once the base was built, I painted the foam with a coat of brown latex paint. The actual shade wasn't important as long as it covered the pink foam. I found a can of mis-tinted brown at Walmart for less than half price that worked perfectly.
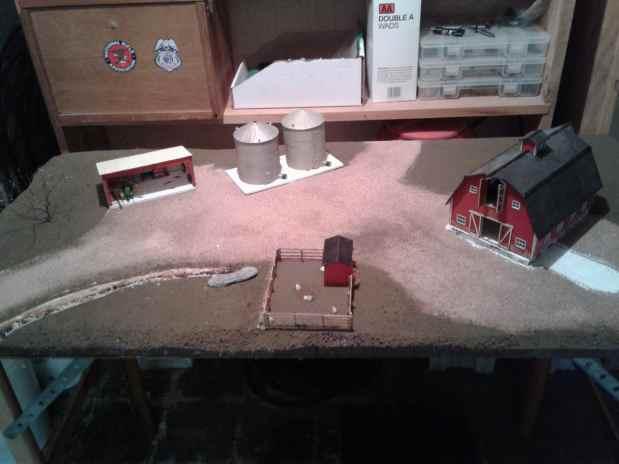
After the paint dried, I sketched in the drive and lanes with a marker and then brushed a thin coat of diluted white Elmer's glue and sprinkled a mixture of HO scale fine ballast to simulate gravel. I used equal parts of gray and light brown ballast.
When that was set, I brushed a coat of the same mix over the other areas and sprinkled medium brown fine ground foam to simulate dirt.
|
|
|
|
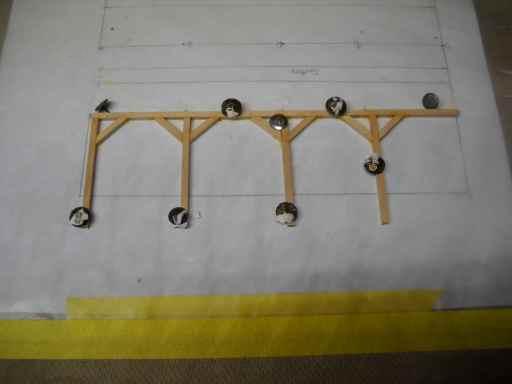
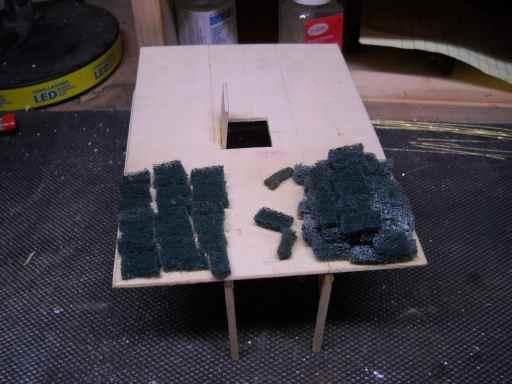
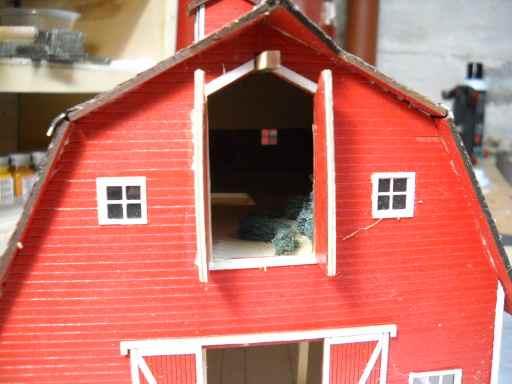
Now it was time to start adding details. The barn was nice enough as built, but didn't have an interior. I glued up a set of supports for a mow floor and used a piece of modeling plywood as the mow floor. The hay bales are cut out of a green kitchen scrubbie.
|
|
|
|
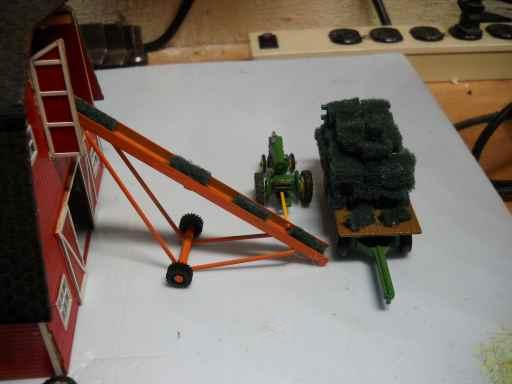
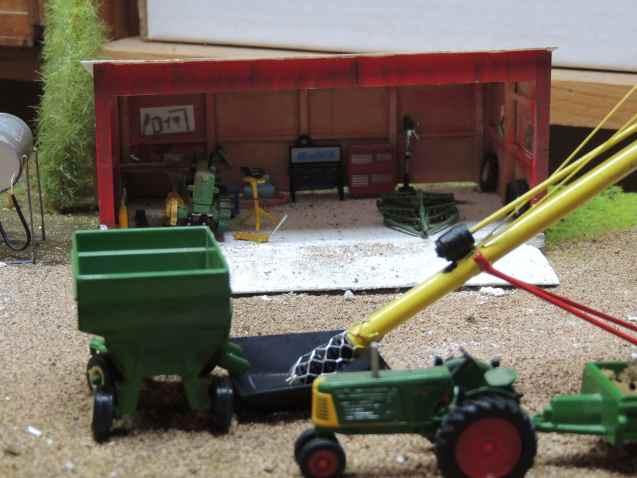
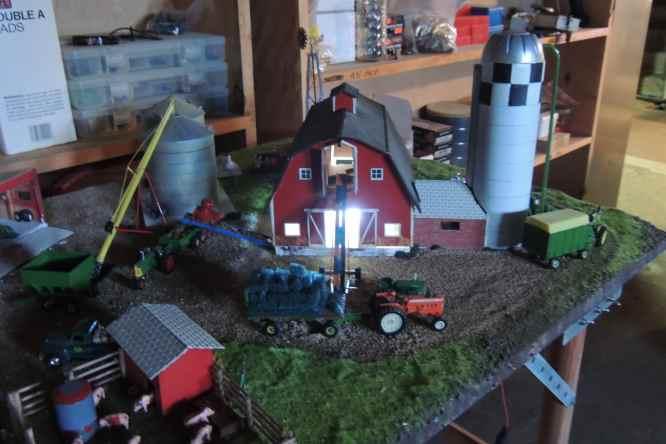
The barn was set on a fieldstone foundation made of plaster of paris and colored with watercolors. The mow was glued in place with a view of the bales through the open doors. Of course the whole point was to use my Ertl toys, so I staged a load of bales and an elevator I scratch built out of brass. It's being powered by a John Deere M.
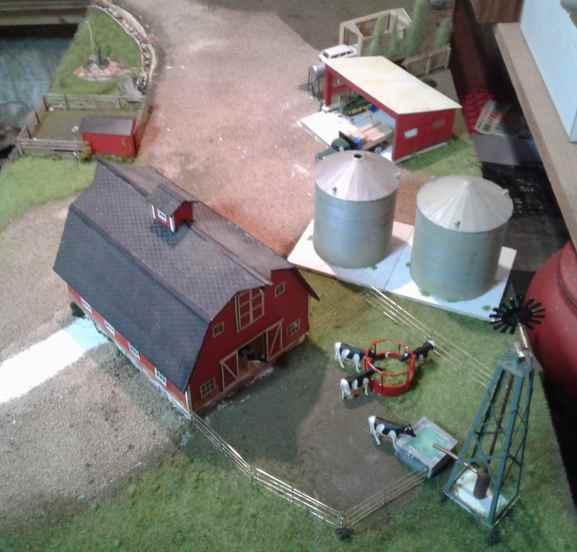
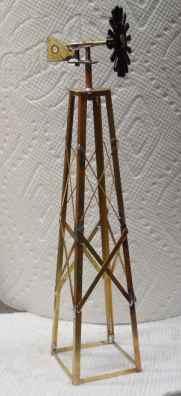
Behind the barn, I built a feed lot complete with a bale ring, scale Holsteins, a water tank and a windmill. The windmill is scratch built from brass, the water tank is molded from plaster of paris and filled with epoxy “water”.
|
|
|
|
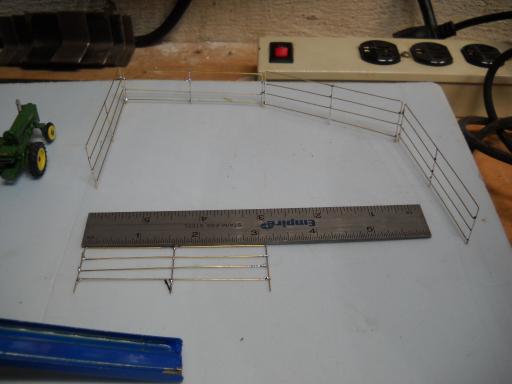
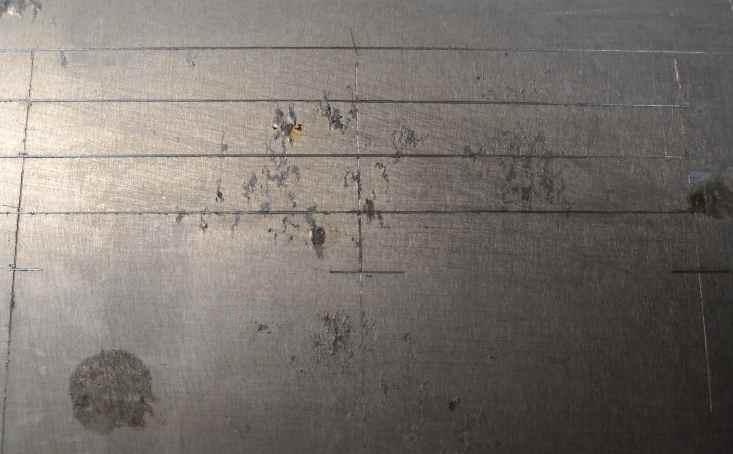
The fence is built from .032 brass wire, bent and soldered to simulate a pipe corral. I scribed the design in a piece of aluminum sheet and laid the brass wire over the pattern so I'd get consistent panels.
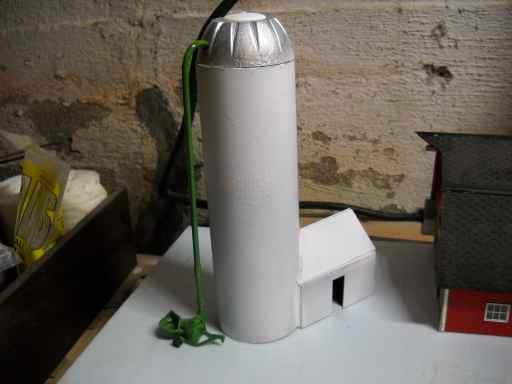
The silo is a piece of PVC downspout that scaled out to 16 feet in diameter and cut to 30 feet tall. The top is a desert cup cut down to fit. It will be detailed with cable stays and a checkerboard top. The silo house is built out of sheet plastic and will get detailed with brick walls and shingles.
The ensilage blower is a Ertl piece with a brass blower pipe added.
|
|
|
|
I added a small hog lot with scale pigs. They came in a generic pink color, I added dark brown patches for a little more visual interest. The building and fence are scratch built from scale lumber. The feeder was turned to scale on my lathe, soaked in polyurethane to seal the wood grain and painted. Bits of plastic for doors were added.
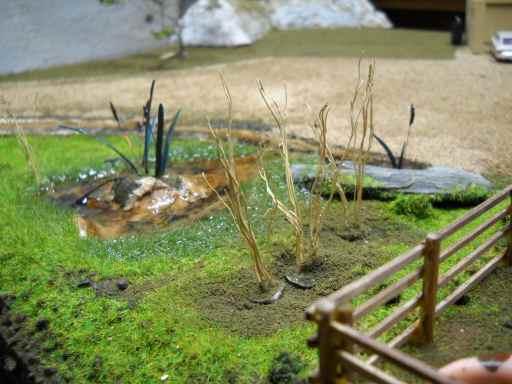
Next to the hog lot is a marshy area done by carving a hollow in the styrofoam base and filling it with epoxy “bar top” material to simulate water. The cattails are made from bits of green insulation sliced off a piece of 24 gauge wire with magnet wire and a blob of brown “puffy paint” for the seed head.
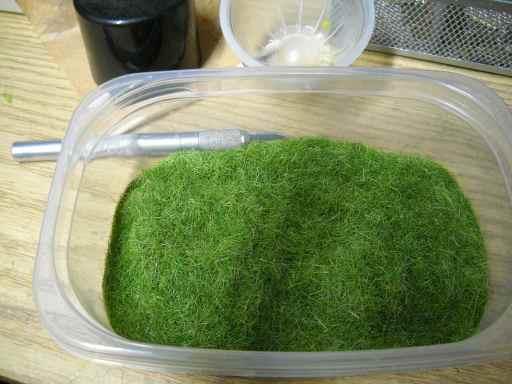
The grass is a product called “static grass”. Basically little pieces of plastic fiber dyed in various shades of green and various lengths. It's applied by artificially generating static electricity. One lead is connected to the base, the other to a shaker. When energized, it creates a static field and the grass is attracted to the base and stands up facing the applicator. A little diluted glue or spray adhesive is applied to the base first for the grass to adhere to.
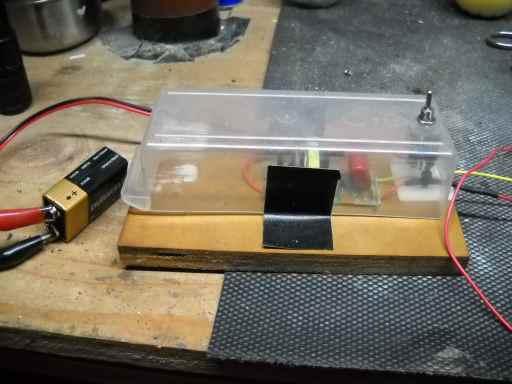
Rather than pony up for a commercial applicator, I built my own. I used the negative ion (static) generator out of an electronic fly swatter and powered it with a 9v battery vs. the 2 AA cells it came with. Output was plenty adequate for 4mm grass but a little wimpy for the longer stuff, so I bought a stronger generator and powered it with a 12v game power supply. Worked great!
|
|
|
|
Any respectable farm needs a shop. Again, scratchbuilt out of scale lumber and plastic, set on a plaster base to simulate a concrete floor. I detailed the interior with scale tools including a floor jack, air compressor, drill press, tool box and hand tools.
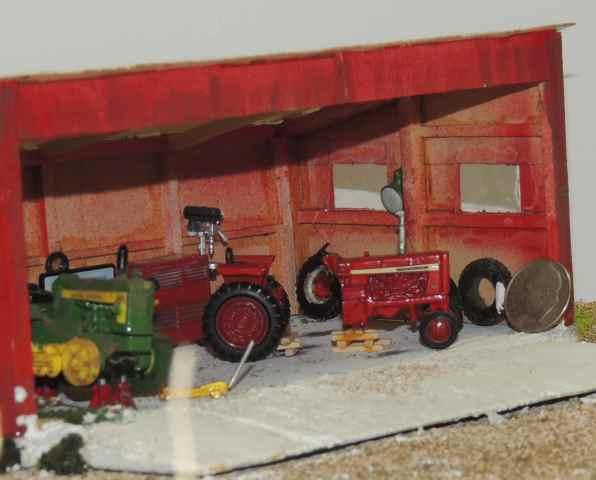
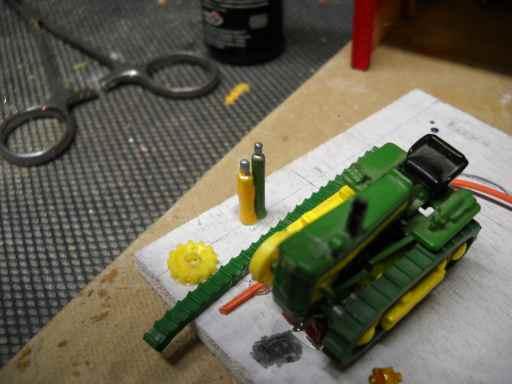
I also included a couple of visual jokes. The 420 crawler is up on jackstands with a track off as a tribute to the 1:1 crawler I bought and soon discovered it needed more repairs than I could afford.
Then there's the IH tractor which I cut in two and blocked up to simulate a tractor that's been split to replace the clutch and TA. We all know IH Torque Amplifiers are more trouble than they're worth...
|
|
|
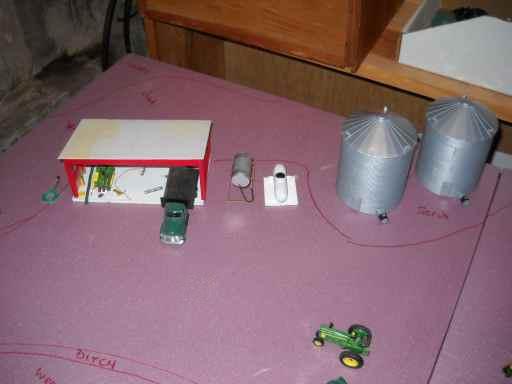
I bought a couple of scale grain bins off Ebay and added a 1000 gallon propane tank for drying and built an auger out of brass to fill them with.
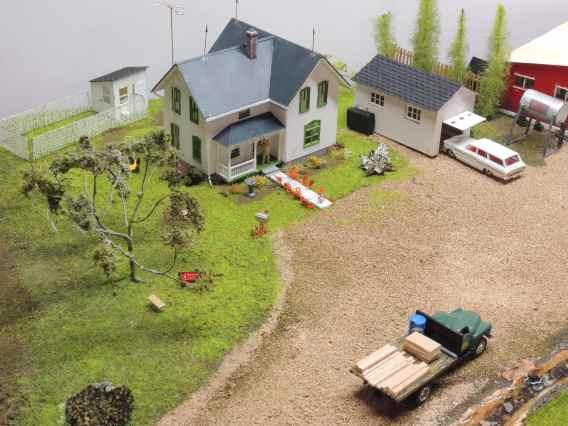
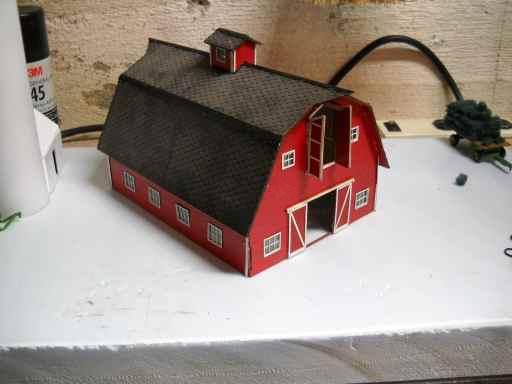
As I was working on detailing the various areas, my wife was looking it over and said “Where's the house?” Sort of a running joke between us: I'll spend money to build a new shed without blinking an eye, but begrudge every dime spent on the house. Typical farmer: Barn first and THEN the house.
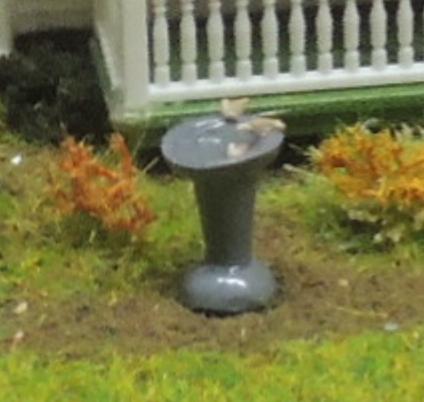
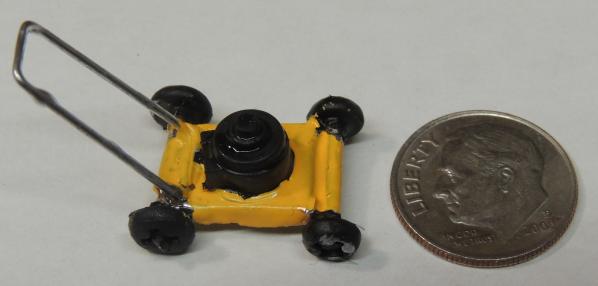
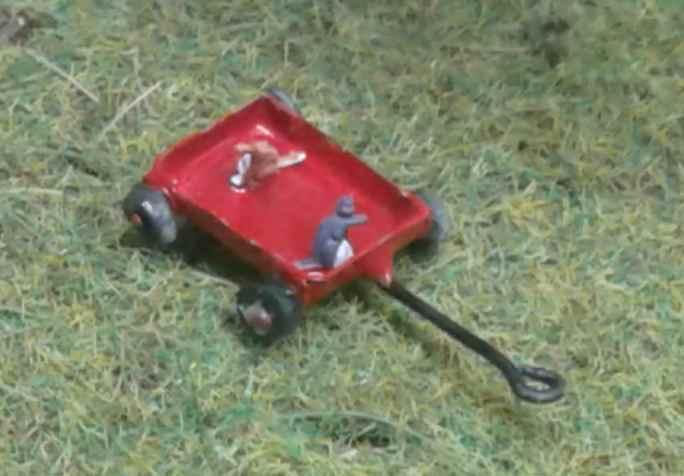
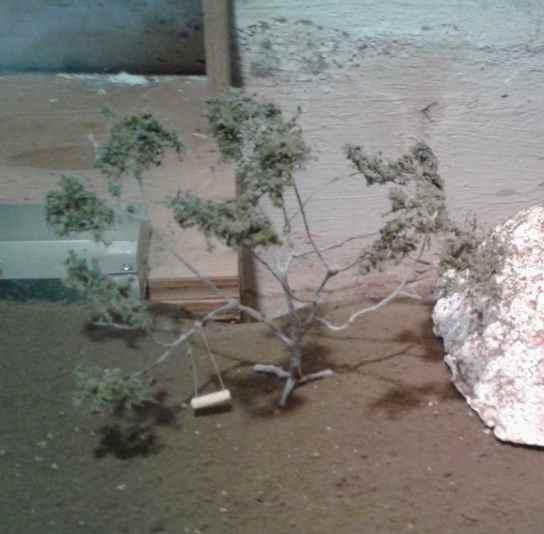
But of course, she was right, so I found a suitable house kit on line and built it. Somewhat coincidentally, it resembles the house I grew up in in some ways. With the basics of the diorama completed, I've spent many enjoyable hours adding little details around the house and garage. The chicken coop out back, the flowers and shrubs, TV antenna, lawn mower, little red wagon, the swing under the tree, a mail box, a birdbath complete with birds and of course the obligatory farm dogs and cats.
|
|
|
|
|
|
|
|
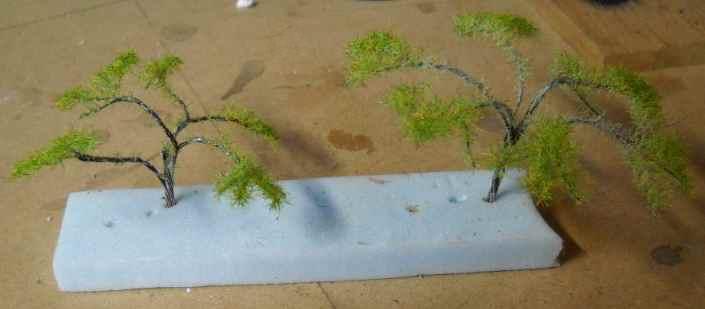
Speaking of trees, I made mine from scratch, using stranded copper wire to make the trunks and branches, coating them with more of the brown paint mentioned earlier for bark and then using my static applicator to create the fir and apple trees. More traditional model railroad foliage material was used to make the big tree with the swing.
|
|
|
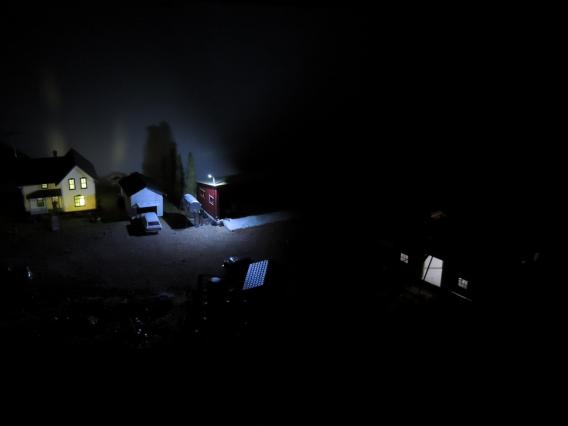
LED lights were installed in the house and barn and a yardlight put in by the shop. They are powered by a 3v wall wart and individually switchable.
So the basic diorama is complete, and now I'll spend my time adding little details and scenes as they occur to me.
Scratchbuilt Corncrib