My 1956 John Deere 420C Crawler
I've
always wanted a dozer to play with. I've never run across one that I
could afford plus I'm fully aware that they're a money pit and you
can ALWAYS hire it done more cheaply (and likely better) than
maintaining a machine to do it yourself. Recently, the stars aligned
and the timing was right (I was looking for a Winter Project to
occupy my time) and one of my "imaginary friends" (Internet
acquaintance) offered me this one at a very reasonable price. Needs
some love but should be fixable without breaking the bank. Too
badly...
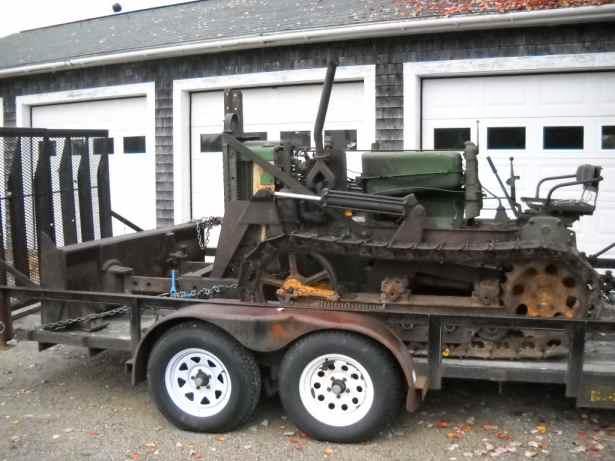
It was in Orange, Massachusetts. My oldest grandson
and I drove down to pick it up. Loading it was an interesting
exercise as all I have is a 4500 pound winch and the crawler weighs
all of that and then some, plus pulling it up the ramps onto the
trailer. Tripling the line through snatch blocks, persistence, an
extra comealong and a big pry bar got it done. Only took about 3
hours...
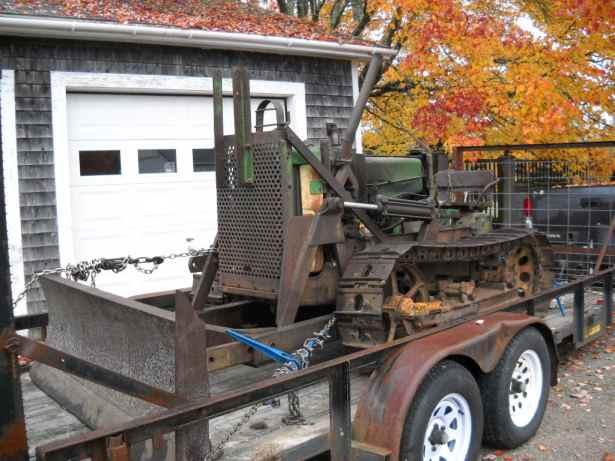
I
took some of the heavier bits off it while waiting for grandson to
arrive. Pulled the brackets off the grille guard and removed the
grille guard, cleaned about 20 pounds of grease-encrusted dirt and
sticks out of it along with half a 5 gallon bucket full of bent
bolts, stacks of flat washers used to make up for bolts that were too
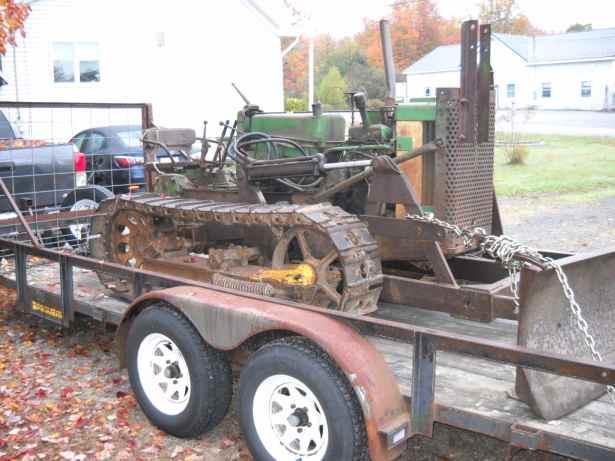
long, the jury-rigged exhaust stack and suchlike. When Casey got here
we removed the dozer blade and then fired up the Cabota and hauled it
off the trailer. A little pushing and shoving got it lined up with
the garage door and we pushed it in. Momma is not too happy about
"her" car sitting outside all Winter, but we usually take
the 4wd truck in the snow anyway.
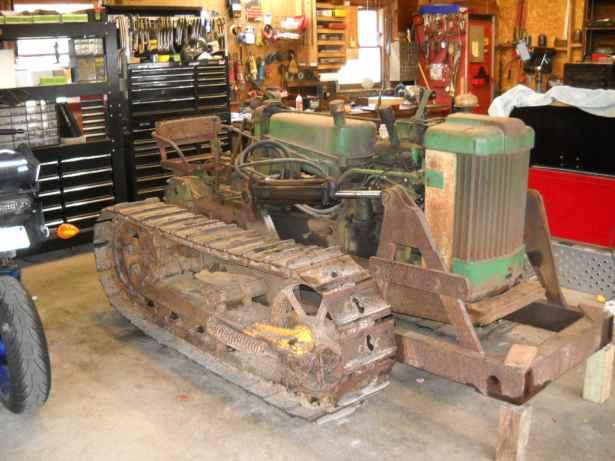
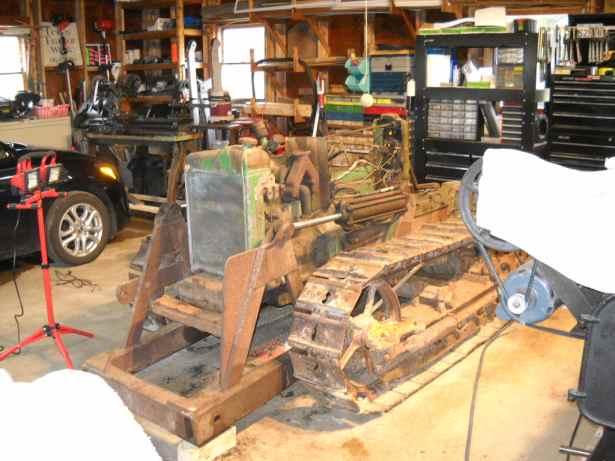
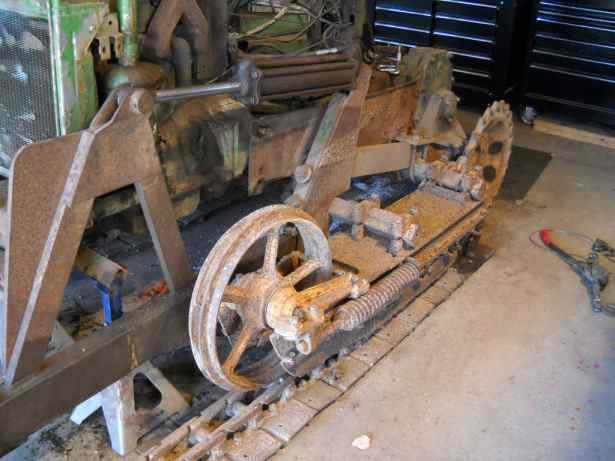
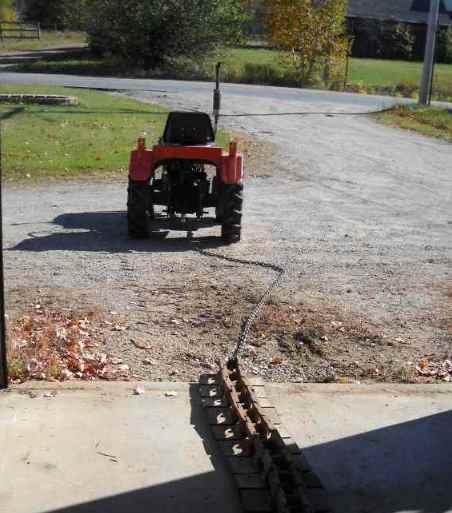
So here it is sitting in it's new home waiting
on a few repairs. It was parked because the transmission tore up a
bearing. The PO (previous owner) was pretty sure replacing the
bearing and cleaning the shrapnel out of the case was all it needed.
Of course, being a crawler, nothing is quite that simple. Fixing the
trans requires removing the tracks, final drives and clutch packs so
there'll be some heavy lifting involved. I've watched a few Youtube
videos (the modern Source of All Knowledge) and it seems to be well
within the capabilities of my tools and Yours Truly. Also noticed the
left front idler wheel is pretty wobbly, probably bearings or the
axle shaft.
I'll start by dropping the belly pan along with
about half an acre's worth of dirt and debris and then draining all
the fluids, flushing the various tanks and replacing filters and
fluids and getting the engine started. It's the same 2 cylinder
gasser as the JD M/40/420/430 series and will probably need
points/plugs/condenser/wires/rotor/cap...the usual tuneup stuff. I'll
also take the carb off and give it a good cleaning before even
attempting to start it.
10/15/2019

Taking the belly pans off was an adventure. Friend of mine said “They are always all bent and bashed up and a booger to get at, but the good news is all the trash, grease and oil dripping everywhere has kept the fasteners lubed up.” He was exactly right. After I got them off, I scraped a couple of 5 gallon buckets full of crud out of the with a flat-nose shovel. I'll manhandle them into my shop press and straighten them as much as I can when I'm ready to reinstall them.
10/17/2019
I've got the rest of the tin off and removed the carburetor, sediment bowl, gas lines and tank. EVERYTHING was plugged solid with dried up varnish. It took me two days of soaking in gasoline and/or acetone and digging at stuff with screwdrivers and reaming the line out with a piece of wire to get things flowing again. Carburetor is not horrible but the gaskets are dried out, the rubber tip rotted off the inlet needle and the throttle butterfly was jammed open. Got a full carburetor kit coming.
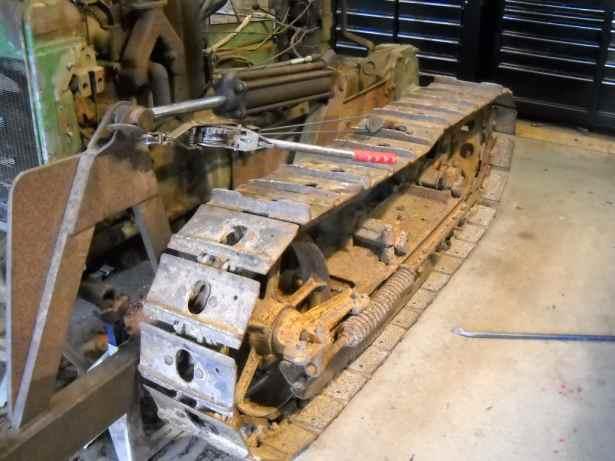
Next step is to get the tracks off. Got the machine up on jack stands with the tracks just clearing the floor and horsed them around with a comealong until the master pin was in a convenient position to press it out.
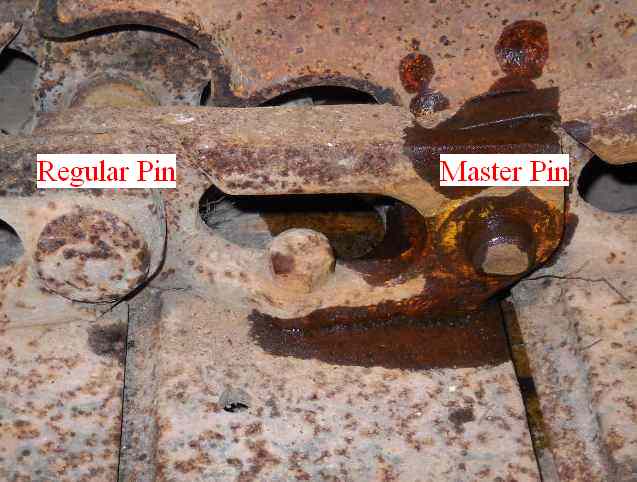
Each track has one master pin that is held in with a circlip (usually missing). The pin can (theoretically) be pressed out and the track removed. Bernie described a jig that will allow me to use a bottle jack to press the pin out. Sure hope it works, NOT looking forward to this fight!

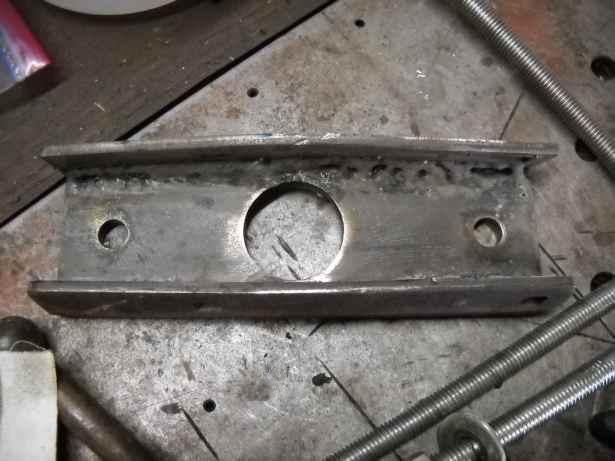
Here's the jig I came up with for pushing the pin out.
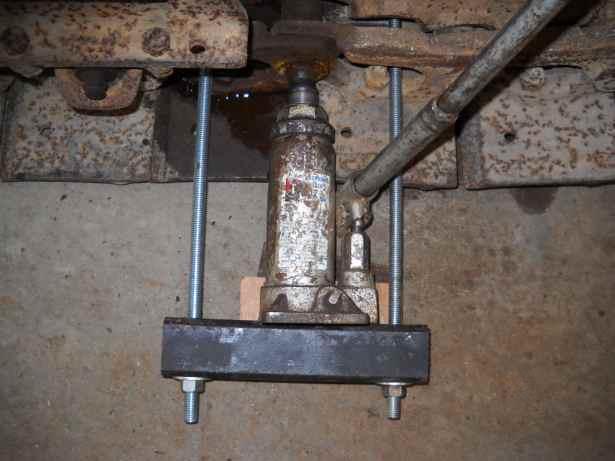
Here it is in place on the track. The lighter stain is PB Blaster. The darker, wet-looking stain is jack oil leaking past the seal on the ram. Oops. Jack is 40+ years old and only a 5 ton, so probably not big enough anyway. Heating the pin and link until they glowed a couple of times didn't appear to make much difference.

So, I extended the threaded rods and rigged my 20 ton jack. Still no joy, but I'll keep pressure on it, rap it smartly with a BFH occasionally, keep soaking it in weasel piss and perhaps put the torch to it a few more times. It'll come out eventually. I hope...
10/18/2019
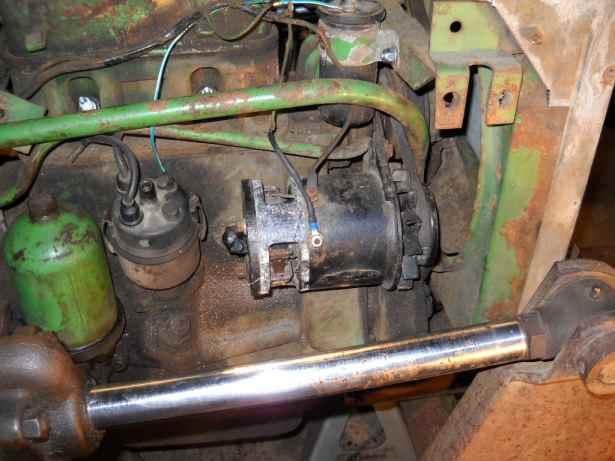
The generator was missing the brush cover, so...

I fabbed up a new one. Did you know you could solder steel? I didn't until I got to playing with it while building a model. Tabs were bent up separately and soldered onto the main band as I didn't have a suitable piece of metal that was long enough to do it in one piece.
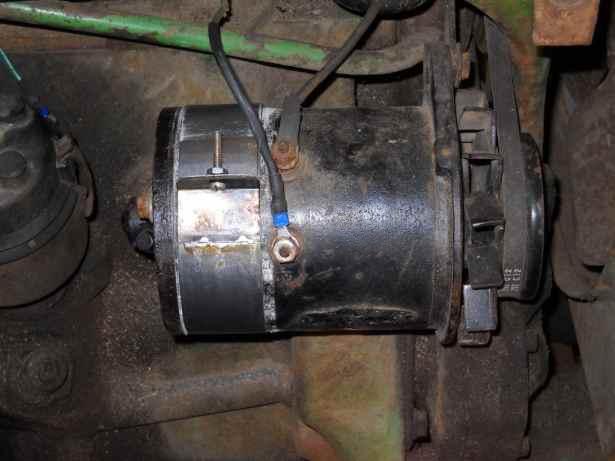
Had to re-position one tab a couple of times to get it to tighten down properly, but it's on and looks good (IMHO...).
I redesigned the inside half of my pin pushing jig to stiffen it up as the original was bending and allowing the inside link to move instead of the pin. That, and getting my head on straight and heating the HEAD of the master pin where it keys into the link resulted in success!
Snugged up the jack good and gave it a solid whack with a 5 pound hammer and it went POP! After that intial movement, it tapped right out with a drift punch and a few love taps. Then I used my engine crane and a comealong to roll it up off the back sprocket and flop it onto the floor.
I'll use Guido to drag it down back and stash it somewhere where I won't hit it with the snowblower or run over it with the tractor. I don't think I'm going to be putting it back on in the next day...or 30...
10/19/2019
Got the carburetor kit installed, refilled the fluids, jury-rigged a coil wire (didn't have any plug wire on hand) and jumpered power to the coil as it wasn't getting it from the ignition switch. Starts and runs! Need to rewire it as the insulation is pretty brittle on most of the wiring and there are a few "field expedient repairs" in the wiring.
10/22/2019

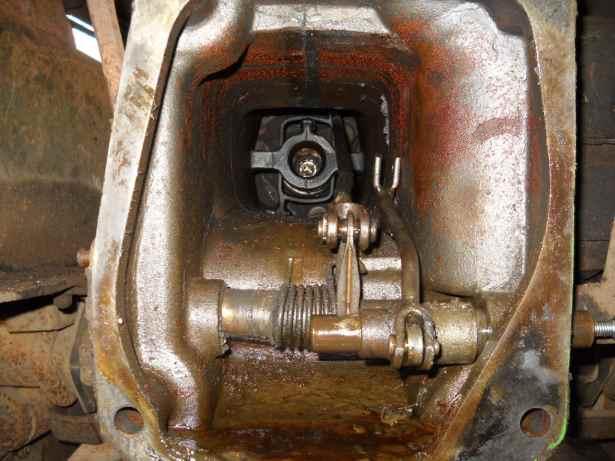
Under about 20 feet of electrical tape, the wiring was much worse than I feared. Bernie loaned me his JD Service Manual which fortunately includes a wiring diagram, so I ripped it all out and completelyl re-wired the machine. Finished that up and cranked it up again to check the hydraulics which I forgot to do last time I had it started. Scared myself for a minute as I didn't initially understand how that old valve body worked. There are two valves in it, stacked vertically. I initially thought “top valve up, bottom valve down”. Nothing moved. Rutro...
Then I remembered that the operating handle had two rods, one to each of the valves. Looking at the linkage, it became obvious how it worked. Pull the handle back, it pulls the top valve out and pushes the bottom valve in, blade comes up. Push the handle forward, it pulls the bottom valve out and pushes the top valve in, blade goes down. Whew...
Lots of leaks and milky fluid so that'll get drained, all the connections cleaned, doped and tightened, and the cylinders will need to be rebuilt.
10/24/2019
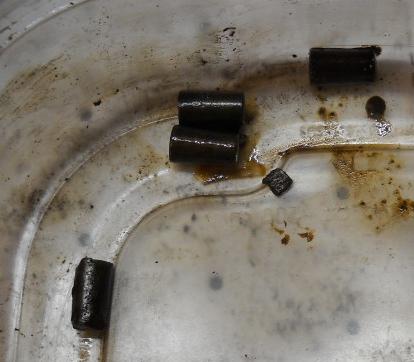
When I bought the crawler, the PO said it had shelled a bearing in the transmission. When I drained the transmission, I found evidence that he was exactly right. He said as soon as he heard the noise, he parked it so hopefully nothing else serious is wrong inside.
Continuing with dis-assembly, I have the right final drive off. I've been referring to the remaining piece on the transmission as the “clutch pack”. Actually, the clutch is part of the final drive assembly, what's left on the transmission is the clutch housing, and turns out it doesn't have to come off to get the transmission off the tractor. It will have to come off to work on the transmission, but it'll be much easier to do with the transmission mounted on a stand, which I'll have to fabricate. Thinking about making an adapter for my engine stand so I can rotate things while I work on it. Won't know if that's possible until I get the transmission off the tractor.
10/26/2019

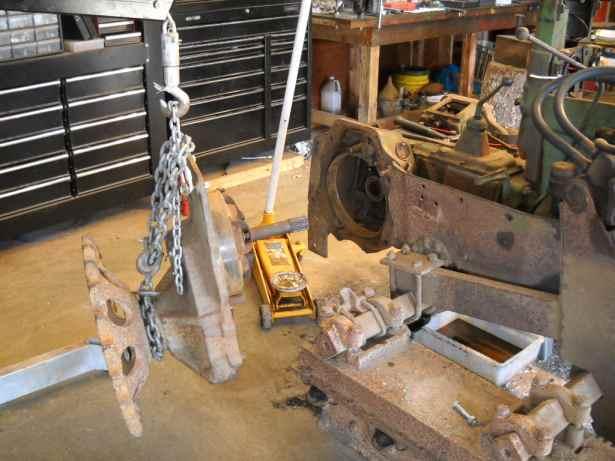
Got the other final drive off yesterday and pulled the transmission today. Working by myself, it took about 5 hours, 4 jacks, an engine crane and a bunch of cribbing. Biggest trick was getting the flange on the front of the transmission up and over the cross-member for the undercarriage without tweaking that 3 foot long propeller shaft. Lot of jack it a little here, let it down a little there, wiggle it, reset everything, rinse and repeat. Heavy booger too.
It's a LONG way through the center section to the throwout bearing and clutch, hence the long propeller shaft. I expect getting it back in is going to be a fun day. I'll need to fab up a way to hold the transmission that allows me to raise/lower and tilt it while rolling it forward into position. Have some ideas on that topic. Next step is to remove the clutch housings and reverser (that casting on the front of the transmission that the propellor shaft sticks out of) and see about a jig to hold the transmission while I work on it.
11/05/2019
ABORT! ABORT! ABORT!